How to: Build a Rear Luggage Rack

How-to's related to accessories and accessorizing the Seca II
User avatar
MOzarkRider
Resident Expert
Resident Expert
Posts: 2334
Joined: Fri Nov 18, 2011 12:13 pm

How to: Build Your Own Rear Rack

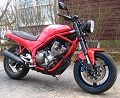
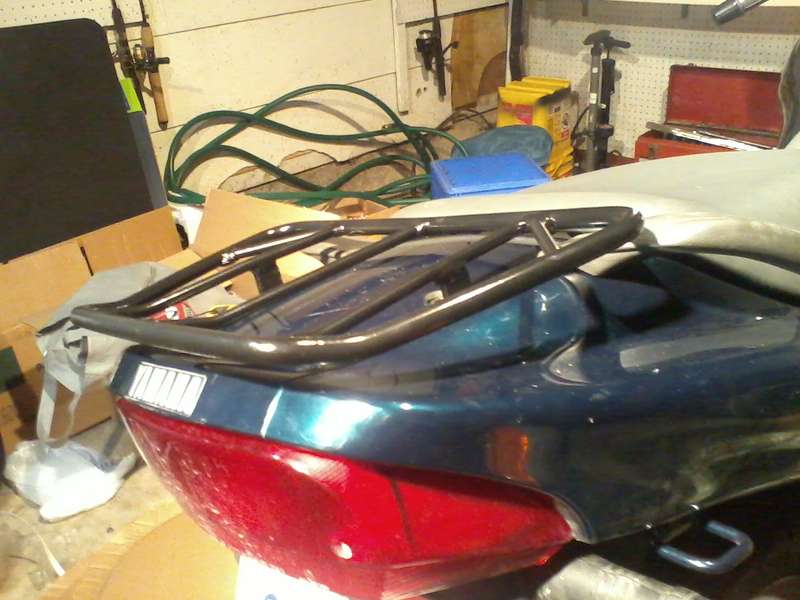
If your not caught up on the forum I just recently purchased a rear rack off of ebay that was supposed to be for an XJ600. It probably was but for the pre-diversion ones. Anyway I made it work and it turned out really nice! Here is what I started with:
Image
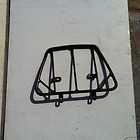
Sorry for the small picture its all I got

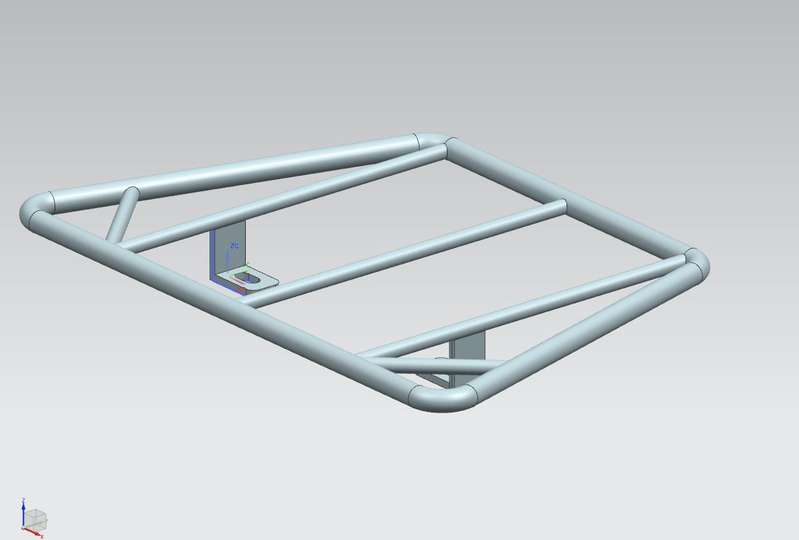
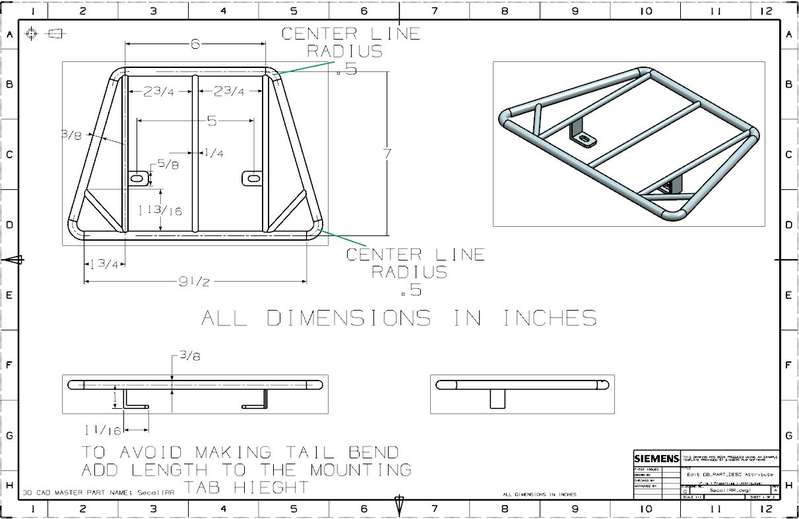
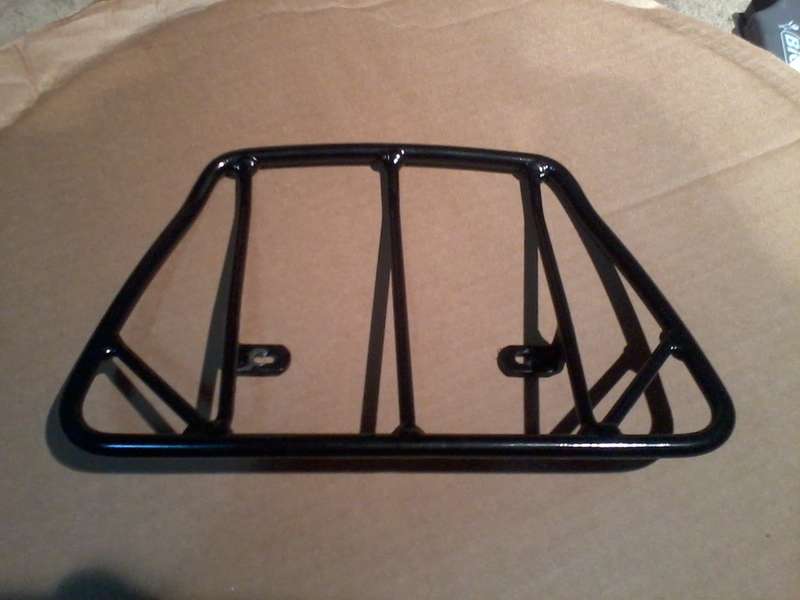
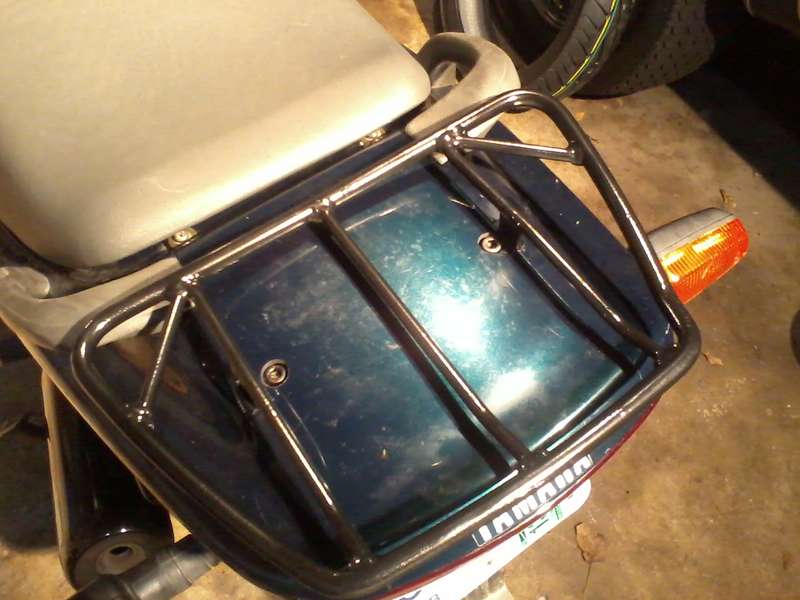
I mocked up the rack the first time and it appears that the center mounting tabs line up with pre-existing threaded holes in the tail part of the frame and the front tabs line up with the mounting holes for the passenger handles. I came to the conclusion that both mounting tabs wont work and that both weren't necessary. So I took the rack into the university shop and cut the front two tabs off. Next I did the paint thing. Primer, black basecoat, two coats of clear. Im not worried about it too much so I didn't do any sanding or prep work. It turned out great:
Image
Image

Ok now that I have a workable part I can start with the mounting. Since my rear fairings interfered with the rack mounting tabs I had to cut reliefs into them. This would have been better done if I would have had a dremel tool. Nevertheless, it turned out ok with only minute defects in the cuts.
Image

Next I focused attention on mounting and removal and how to incorporate the rack and still be able to mount up the middle portion of the rear fairing. I decided to drill holes in the middle rear fairing. This seems to be the most effective and best looking alternative to mounting the rack. It allows the rack to be taken off easily but removal of the rack requires removal of the middle tail fairing as well. This makes the rack a permanent fixture of the bike, unless you dont mind empty holes in your fairings lol...
Image

After I did one side without any real precise measuring I flipped the rear tail cover over and seen that there are perforated circles that are exactly where you need to drill out. I wish I would have seen that first but both sides turned out great but the second one was just slightly better since I had a solid guide.
Image

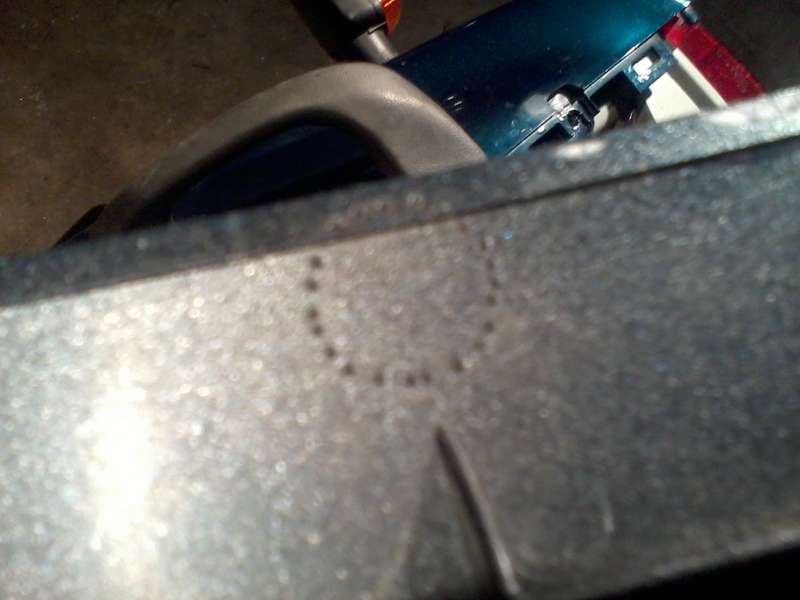
I think the holes are 1/2" in diameter but I used a conical grinding stone to widen the hole to the correct diameter after I used a 3/8" drill-bit to create the hole. ( I did use 3 steps of pilot holes first that way the large drill-bit wouldnt rip my plastic.
To mount the rack I used M-6 x 1" allen head bolts ( the same ones you would use for the carb sync screw replacement mod) Which I had in stock :grins:
And Shes installed!! And lookin good except today I gouged the underside of the paint job pulling out one of the bolts :wallbash: oh well you cant see it...
Image
Image
Image

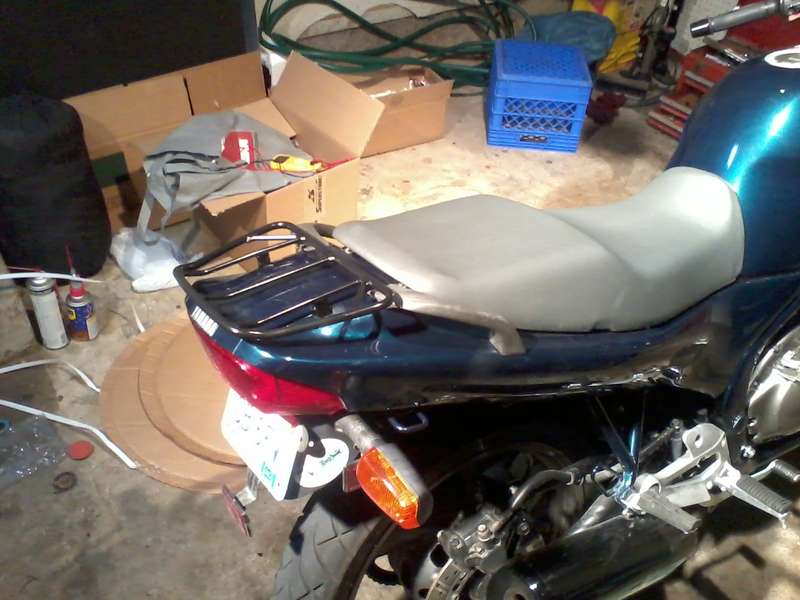
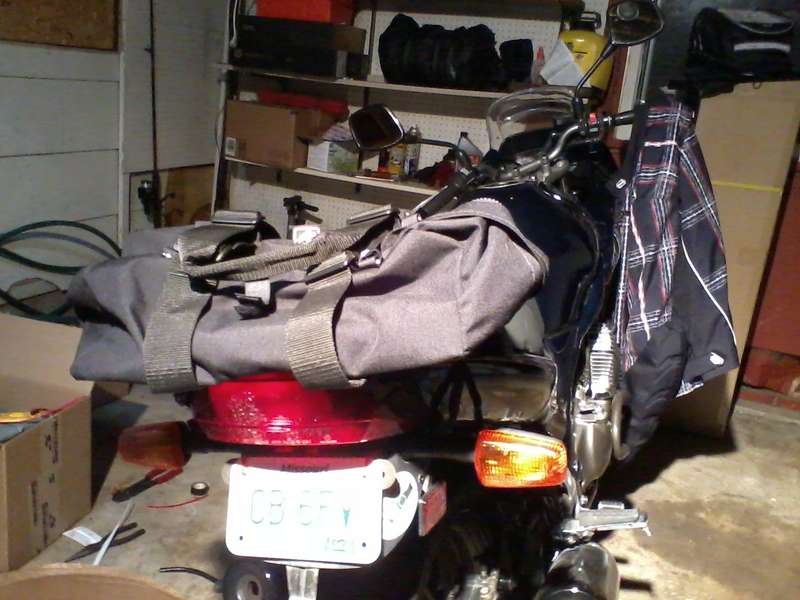
And now I can have my tailbag on the bike and be able to remove the seat to get to my helmet hangers and also I can ride two up with extra luggage space.
Image

I was not able to do the specs drawing today but am really really gonna try to do it tomorrow so look forward to that.
"A life you don't live is still lost" Goo Goo Dolls
"Its not about the years of your life its about the life in your years" Abraham Lincon
92' Yamaha Seca II
14' KTM 200XC-W
Brian
User avatar
radare
Site Founder
Site Founder
Posts: 10420
Joined: Mon Nov 07, 2011 12:42 pm
Location: Denver, CO
Contact:

Nice rack! ;)

Is it sturdy? Think you could mount a Givi Trunk or Pelican Storm Case to it?
User avatar
MOzarkRider
Resident Expert
Resident Expert
Posts: 2334
Joined: Fri Nov 18, 2011 12:13 pm

Its pretty darn sturdy in my opinion. I could grab the rack and move the bike around... You could always beef up the supports if you were making your own or modify the rack itself. I have the CAD drawings made up for it except without the little bend on the tail side of the rack that would be really challenging to do in NX. But It will have plenty of details for someone wanting to make thier own.
"A life you don't live is still lost" Goo Goo Dolls
"Its not about the years of your life its about the life in your years" Abraham Lincon
92' Yamaha Seca II
14' KTM 200XC-W
Brian
User avatar
Nelsonmd
FAQ Moderator
FAQ Moderator
Posts: 1404
Joined: Wed Nov 16, 2011 4:35 pm
Location: Albuquerque, NM

It looks like it is only held on by the 2 tabs, is that correct? Seems like front to back force could cause some high stress in those tabs.
NelsonMD's 92 XJ600 Project Thread

NelsonMD's 4Runner Build Thread (Rusted out)
2002 Suzuki V-Strom 1000 (gone)
2004 Vespa ET4 (sold)
User avatar
MOzarkRider
Resident Expert
Resident Expert
Posts: 2334
Joined: Fri Nov 18, 2011 12:13 pm

Yes it is only held on by the two tabs but they are pretty sturdily attached to both the frame and the rack like I said I can pull it pretty hard ant it doesn't move/deflect/buckle/hit the plastic or anything. Plus that's really the only way it will mount up without redesigning or creating a new rack.
"A life you don't live is still lost" Goo Goo Dolls
"Its not about the years of your life its about the life in your years" Abraham Lincon
92' Yamaha Seca II
14' KTM 200XC-W
Brian
User avatar
radare
Site Founder
Site Founder
Posts: 10420
Joined: Mon Nov 07, 2011 12:42 pm
Location: Denver, CO
Contact:

If a guy were building one, could he add two front mounts to grab those bolts under the back of the seat? I'd think that'd only be necessary if one were running a rear case.
User avatar
MOzarkRider
Resident Expert
Resident Expert
Posts: 2334
Joined: Fri Nov 18, 2011 12:13 pm

I was going to do that but I dont think it will work unless you didn't care about keeping the middle plastic on your rear fairing. or didnt care if it didnt look right. The front tabs that were on the rack when I started would interfere with the mounting of that piece. The bolt would stick up too high and cause the plastic peice to not mount. I guess you could drill holes like I did in the plastic piece for my two mounting tabs. but still no promises on whether that by itself would work. You would have to cut a significant portion of that middle plastic piece out to get it to work. Heres a pic for reference:
Image
If I were going to add a top case Id would
1) remove the handles and then I would make the whole rack longer front to back by adding a couple inches to the front and then using the same type of tabs as the two current ones bolt the tabs to the holes for the handles. While I was at it Id beef the whole thing up with thicker round-stock.
2) get a smaller top case that wouldn't require that much support. :lol:
I am assuming you are talking about an ADV style top case freakin steamer trunk on your bike. lol.... A moderately sized one like this
Image
would be fine I think on that rack with two tabs.
"A life you don't live is still lost" Goo Goo Dolls
"Its not about the years of your life its about the life in your years" Abraham Lincon
92' Yamaha Seca II
14' KTM 200XC-W
Brian
User avatar
radare
Site Founder
Site Founder
Posts: 10420
Joined: Mon Nov 07, 2011 12:42 pm
Location: Denver, CO
Contact:

Thanks for the info. I want sidebags on the 97 and a rack at least. I may not need a rear bag.
User avatar
MOzarkRider
Resident Expert
Resident Expert
Posts: 2334
Joined: Fri Nov 18, 2011 12:13 pm

Here are the dimensions as promised hope you can read them if you cant let me know and I will fix them. Also like I said before I didnt put that little bend in there that the rack has to miss the upturn in the tail section of the bike. If your building it you can either try to put the bend in or make the tabs just a little taller either one would work fine.

Image

Image

Edit looks like I cannot see the dimensions I will fix it here in a sec.
"A life you don't live is still lost" Goo Goo Dolls
"Its not about the years of your life its about the life in your years" Abraham Lincon
92' Yamaha Seca II
14' KTM 200XC-W
Brian
User avatar
radare
Site Founder
Site Founder
Posts: 10420
Joined: Mon Nov 07, 2011 12:42 pm
Location: Denver, CO
Contact:

Fantastic! The flat rack will work much better with the 97 tail.
Post Reply