This mod will allow you to adjust your ignition timing from 0 to 4 degrees, advance. It has been reported that this provides better power through mid and upper RPM band. NOTE: It is recommended that you run high octane fuel (91+ Octane) after performing this mod to avoid detonation and engine damage.
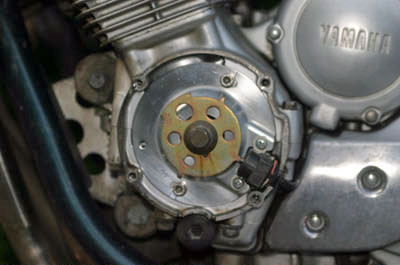
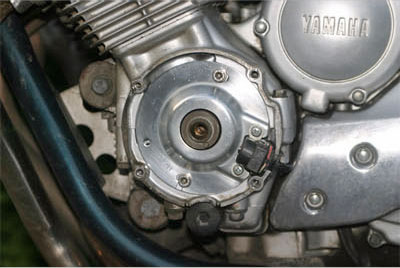
Remove the left-side engine cover and you'll see this. The mod requires removal of this timing disc:
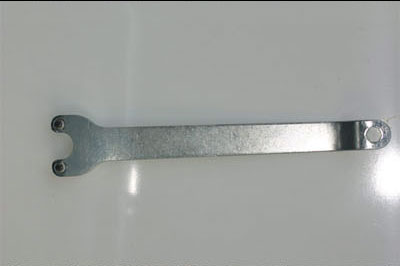
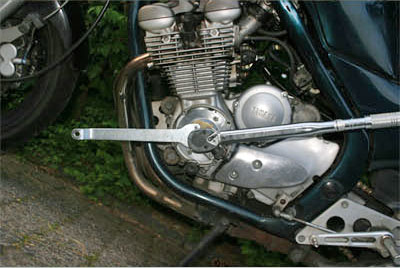
To remove the timing disc, use a grinder-disc tool (available at Harbor Freight) to hold the disc stationary:
And then remove the center bolt:
With the timing disc of, you'll see the sensor plate. Remove the bolts securing the plate and remove the plate:
The goal is to elongate the mouting holes so that the sensor plate can be rotated. Here's a quick template of the work:
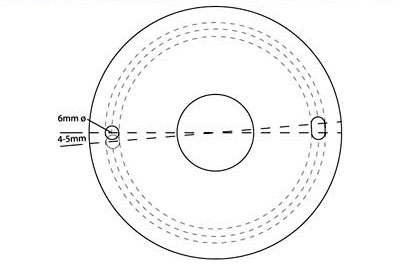
Use a 6mm drill bit to drill a hole above the right-hand hole and below the left-hand hole. Use an awl to open up a slot between drilled holes:

Install the plate and the disc and align the plate to the new holes. It should be rotated clockwise a maximum of 4 degrees from its original position.

Reinstall the cover and take a test ride. Keep an ear out for detonation and retard the timing a degree or two if any is heard.
To index the plate, you should use a degree wheel. You can download a free degree wheel here:
http://www.swarfrat.com/MotorcycleDegreeWheel.htm