I thought I'd formalize my crack repair process. This will work on any of the ABS plastic pieces on the bike.
Tools Needed:
- 1. ABS Specific Cement (this is very important; you MUST use black ABS cement)
2. ABS patching material
3. Heat Gun
4. 40-grit sandpaper
5. 220-grit sandpaper
6. Blue painters tape
- 1. Sand the damaged area
2. Hold the part back together with tape
3. Apply ABS cement to the backside of the part and reinforce it with ABS plastic.
4. Apply ABS cement to the front of the part to act as a filler
5. Sand the ABS cement until the part is smooth
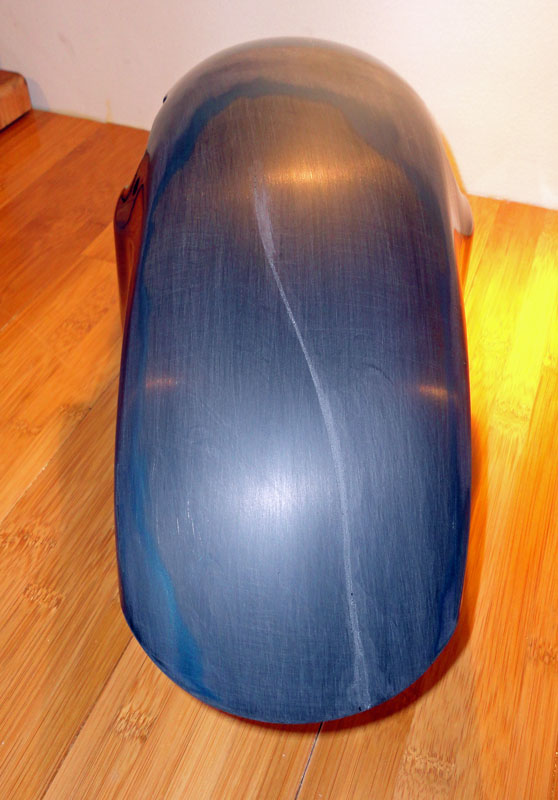
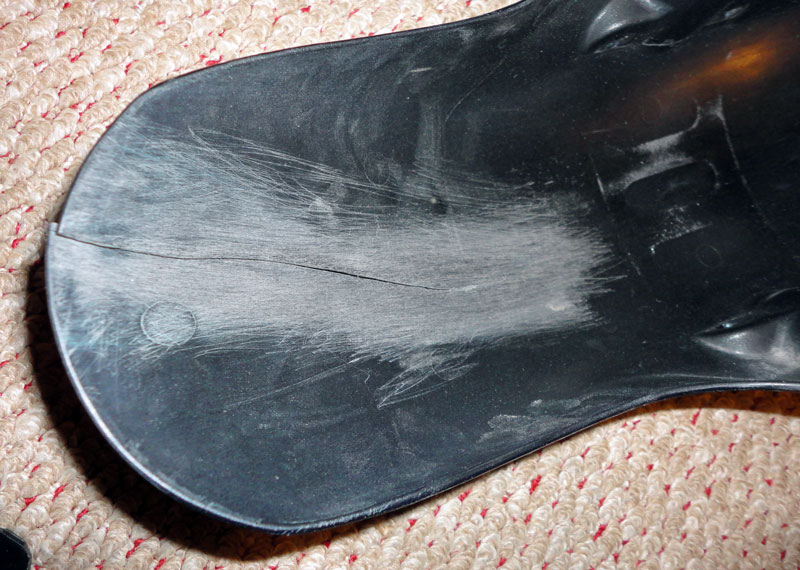
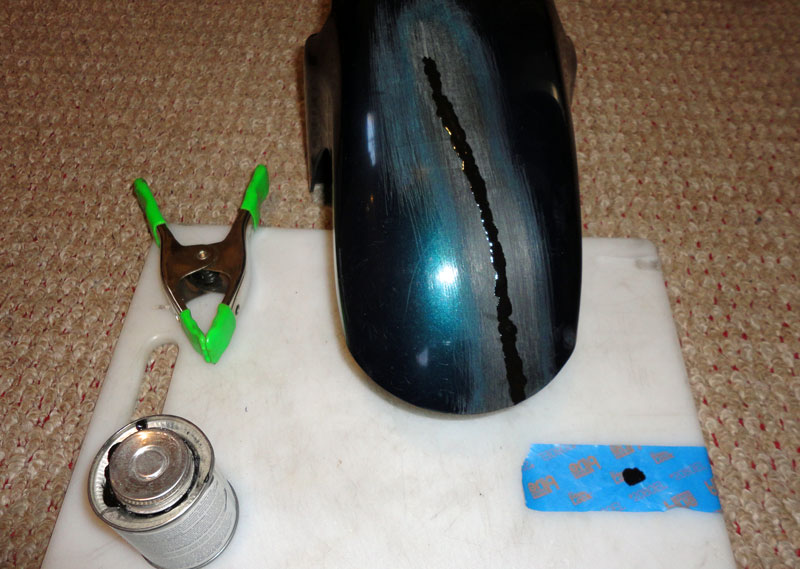
Here's the crack in my front fender that I'm going to repair:
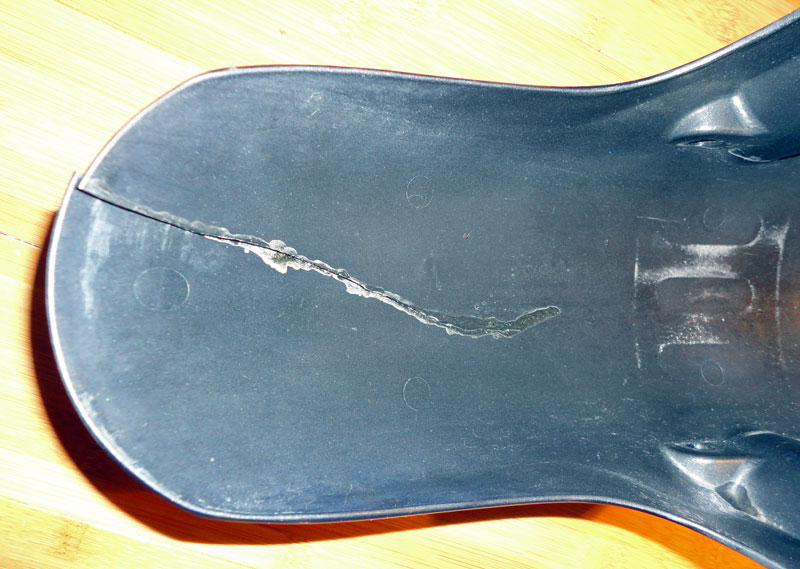
The same crack, from the underside of the fender. Note that a previous owner tried to repair the crack with super glue and it failed. Note that the crack does not align properly:
Begin the repair by sanding both sides with 40-grit paper. This will prepare the plastic and clean out any paint or old glue which will prevent the repair from bonding. There should be absolutely no paint or old glue on the repair site; the ABS cement must contact fresh ABS plastic:

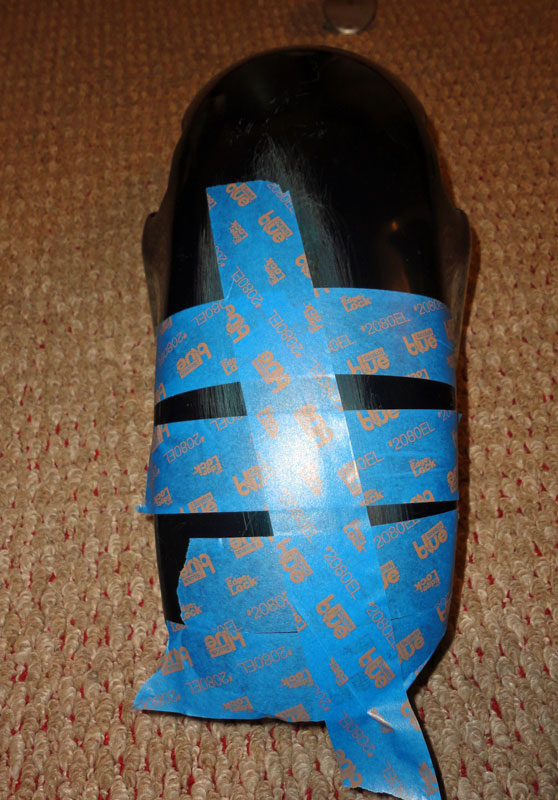
Use blue tape (or any adequately sticky tape) to hold the crack together. I also run a piece of tape the length of the crack to keep the adhesive from leaking out of the repair:
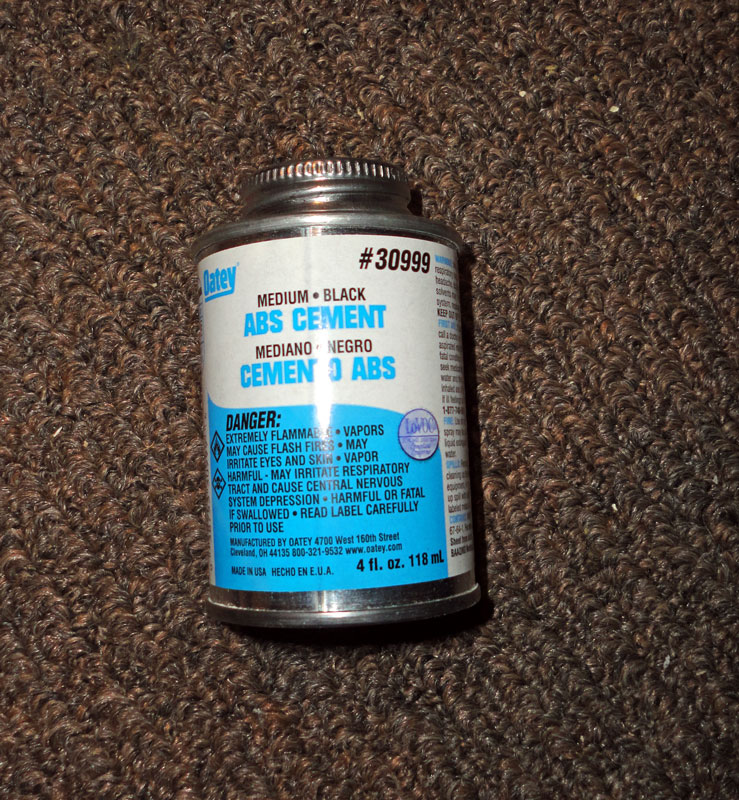
Buy some ABS Cement. It is available at Home Depot or Lowes in the plumbing section with the black ABS pipe. The cement must be ABS specific cement. For this method, you do not want the stuff that is advertised to work on PVC or other types of plastic. This glue is ABS specific and the glue itself is black in color:
To reinforce the damage, we'll glue a piece of ABS plastic to the backside of it. It is crucial that the plastic piece used to reinforce the part is made from ABS. ABS cement is a mixture of ABS plastic and Acetone. When ABS cement is used between two pieces of ABS plastic, it bond chemically to both pieces, effectively welding them together. If other plastics or adhesive are used, they will not weld and the repair will not be as strong.
You most likely have some scrap ABS plastic around the house. It is commonly used on automotive plastic parts and motorcycle fairings. It will be marked specifically with the ABS marking. If you do not have scrap ABS, you can purchase 12" x 12" square sheets of ABS plastic, 1/8" thick, from many hardware and craft stores on online from sellers on EBay.
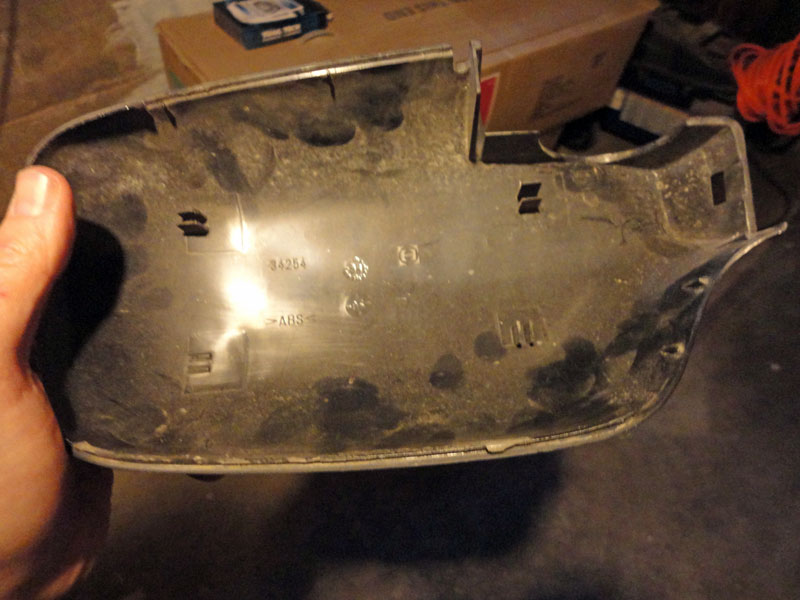
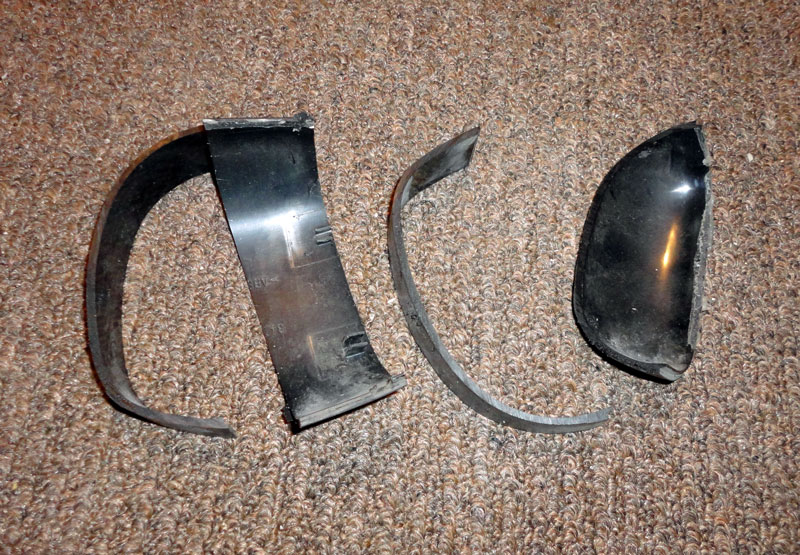
I found a piece of ABS plastic; an old mirror housing from a SAAB I owned years ago. It is clearly marked ABS on the back to indicate it is ABS plastic. Look for this mark on the piece you use:
I cut the ABS plastic into strips to make it more manageable in shaping for the repair:
Use a heat gun to shape the ABS plastic to the contour of the backside of what you're repairing. Do this BEFORE you apply any glue as it will take a couple times of heating and bending to get the shape right.
Once you have the reinforcement shaped, apply ABS cement to the length of the crack and press the plastic reinforcement into the glue. Use spring clamps to hold the reinforcement in place until the glue dries.

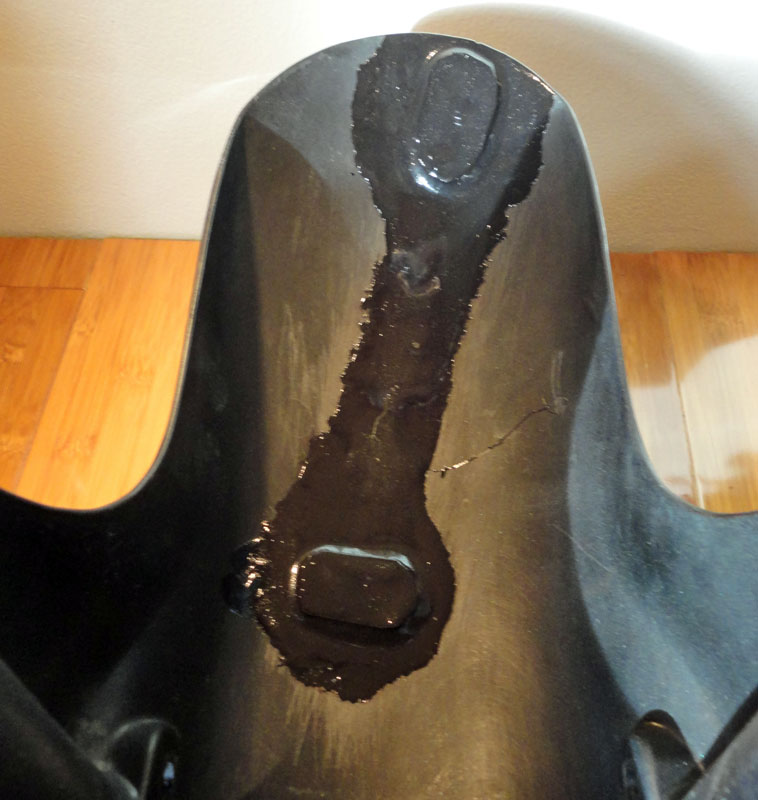
Allow the glue to dry overnight, remove the spring clamps and apply a second coat of ABS cement over the top of the reinforcements. This will fill in their edges and should eliminate stress risers. Here's the finished repair on the underside of the fender:
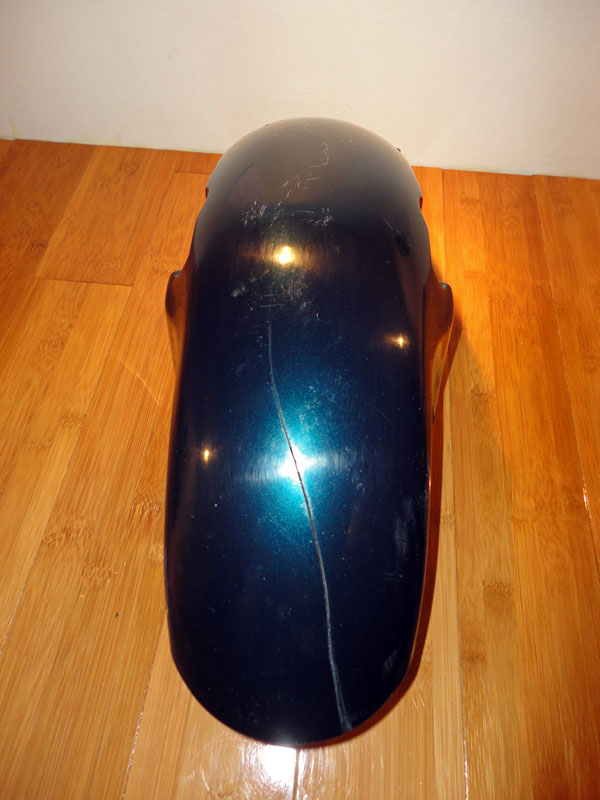
Here's the top side of the fender with the tape removed:

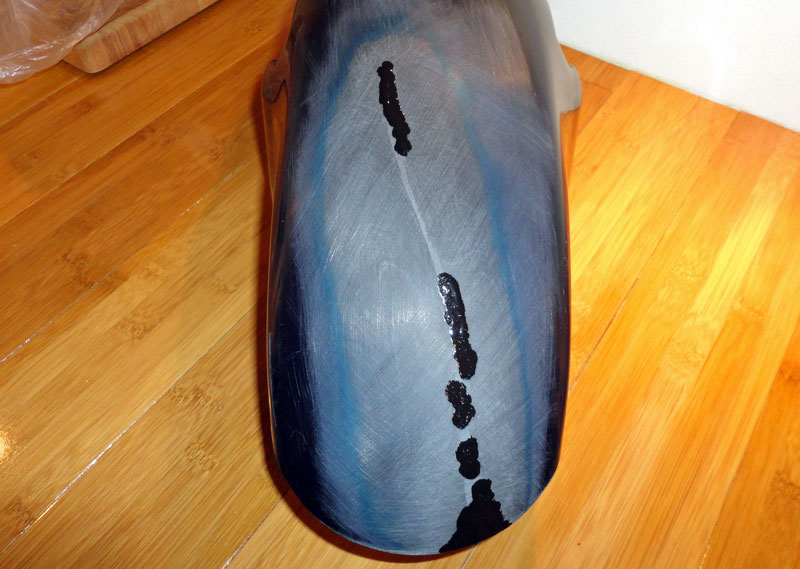
To make the topside look good, use a Q-tip and apply a coat of ABS cement the length of the crack. The goal here is to fill in the crack but to minimize the amount of glue used as you will be sanding it flat after it dries:
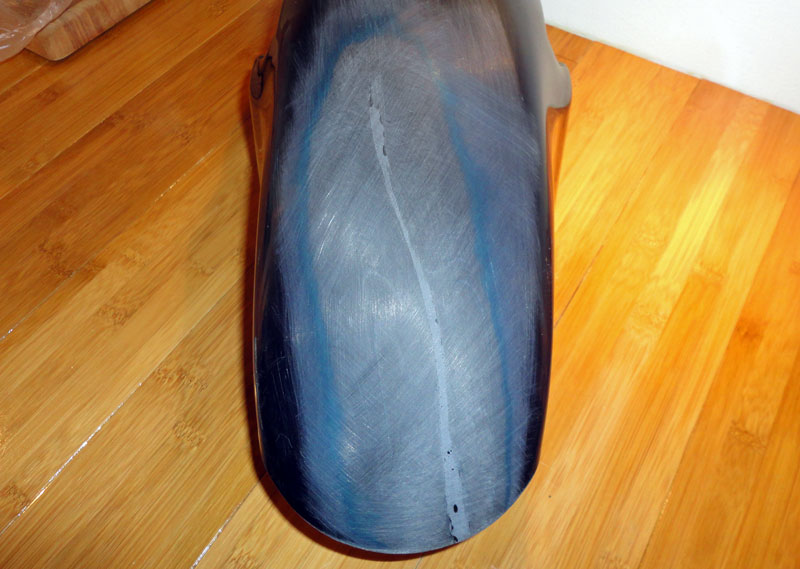
Allow the glue to dry overnight (yes, overnight) and then sand it flat with 220 grit wet-or-dry sandpaper. Use dish soap in the water and sand it wet. Sand across the repair (not along it) to keep from digging a valley in the part with the sandpaper. Here's the fender with the first coat sanded flat. The black spots are low spots that will need a second coat:
Apply a second coat of ABS cement to the areas which are low and require a second coat:
Sand the second coat in the same fashion as the first. Here is the repaired part, ready for primer and paint. The repair is undetectable to finger tips and won't be noticeable to anyone unless they have the wheel off and can see the underside: